User Opinions
|
||||||||||
|
|
|
| Wed May 14, 2008 - 3:38 AM EDT - By Dan Nimtz | |
|
|
|
|
|||||||||||
Have you heard people say "that Palm's interface is a little dated..."? Have you grown bored looking at the same basic Palm interface for years? Are you looking for a little new eye candy for your precious device? Well, then my friend, you're going to love SkinUI from PalmPowerups. And wait until you see the price it can be had for...
The first step of course is to grab your own copy here.
Oh, yeah, and no need for your credit card, because it's free - yep, completely free. Thanks to the generosity of it's author, Dmitry Grinberg. Sadly, he states that he is getting out of the Palm development business. But this little gem is his going away gift to us.
Once you download the skUI.zip file, unzip it and you'll find the following:
For this review, I also installed this skin from www.palmpowerups.com:
In addition to the selection of skins available above, you can find more by visiting 1src and searching the forums there.
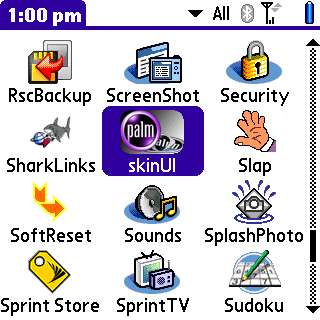
Everything is installed, so let's take a peek under the hood. Start by selecting the skinUI application from your launcher.
After clicking the application's icon, you'll be greeted with this message: "SkinUI now freeware - please buy PalmPowerup apps". Normally that might bother me, but since Dmitry has provided this utility for free, we'll cut him some slack on this one. You can turn this behavior off in the preferences as well.
SkinUI's initial startup screen looks like this:
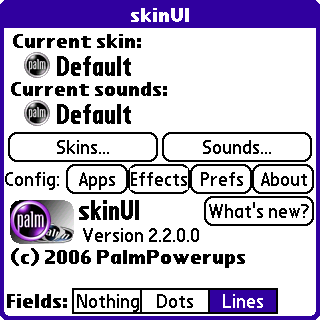
As you can see, the following buttons and features are available (I'll cover each in more detail in the next section):
Note: none of the skins I found included Sounds so I wasn't able to play around with this aspect of skinUI. Perhaps information regarding the usage of Sounds... can be found on PalmPowerups website?
To begin this tour, let's start by selecting a new skin from the Skins... button. Upon clicking the Skins... button we are presented with the following:
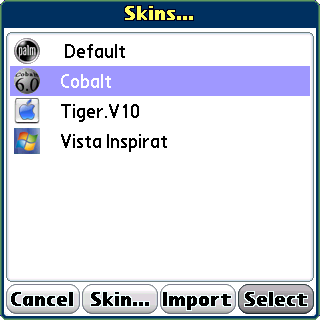
As you can see, the previously installed skins are listed, as well as an option to Import skins (presumably from other skinning programs such as PalmRevolt).
For the remainder of this review, we will use the Cobalt skin. So we click Cobalt and then press the Select button.
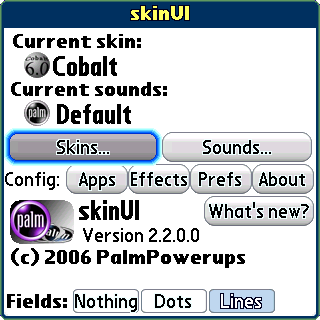
At this point, the screen will blank briefly, and a slick moving graphic will appear stating that the selected skin is being activated. Once that has completed, we are returned to the main application screen where Cobalt is now listed as the active skin.
After activating this skin, when the Centro transitions from one screen to another, there is a very neat fad-in, fad-out type affect. I later learned that this behavior can be configured in a variety of ways. I'll describe that more in the Prefs section.
Once a particular skin is higlighted on the Skins... screen, clicking on the Skin ... button on the bottom displays a set of popup selections.
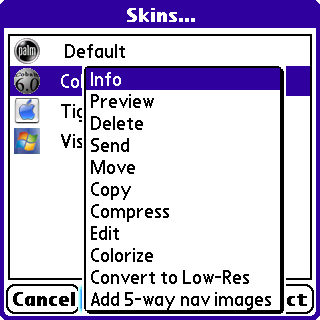
These are actions that can be performed on the selected skin. Let's take a brief look at each.
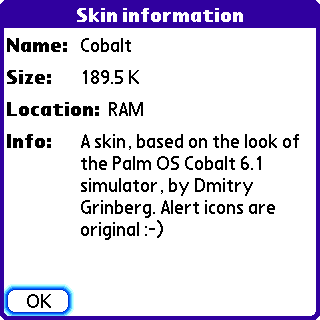
The Info screen displays information relevant to the skin itself. Here the name, size, skin description and where the skin is located (RAM or expansion card) is shown.
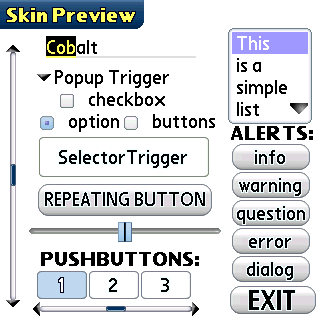
The Preview panel has a lot of information. It contains working examples of virtually all Palm OS controls and displays. This one screen allows you to visualize how each of these will look, and since they are working controls, you can click the buttons, cause a popup menu to appear, move the sliders, check the boxes, see what selecting text will look like, and display the various warning and error boxes. This is a great feature since you don't have to leave the application to see what your new skin is going to look like in action.
One minor issue I had on this screen- I wasn't able to navigate around to all of the controls using the 5-way navigator. Some manipulations required using the stylus.
The Delete option allows you to delete the skin from your system. You are given a confirmation dialog to insure this is what you want to do. The delete option works regardless of where the skin resides - in RAM or on your memory card.
Selecting the Send option brings up a dialog asking how you would like to Send this skin: Beam, Bluetooth, Email. This of course allows you to share the selected skin with others.
The Move option allows you to transfer the skin from RAM to your memory card, and vice versa. Skins are moved to your memory card and into the \Palm\PROGRAMS\skinUI directory. When the skin is moved from RAM to your memory card, a small icon representing the SD card appears in front of the skin's name. Alas, when I moved a skin from the memory card back to RAM, the icon did not seem to disappear properly. In general, I found some issues with this Move function. It would often report an error - "Cannot move the default skin" , even when the skin being moved was not the default.
In a similar way this operation copies the selected skin to either the memory card, or to RAM depending upon the location of the skin selected. The previously mentioned directory (\Palm\PROGRAMS\skinUI) is used as the target of copies to the memory card.
By choosing the Compress option, you can attempt to save RAM space by compressing the skin. If the compression did not result in any savings, a message is displayed indicating that no space was saved. None of the skins that I had installed seemed to benefit from this option.
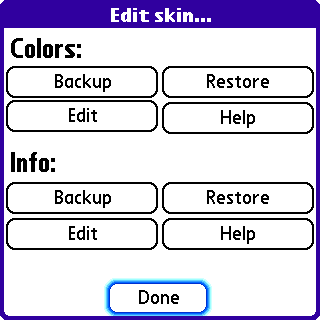
This screen has two main sections - Colors and Info. In each of the sections you can choose to Backup and Restore the skin (to insure you can recover from any blunders), in addition to being able to Edit the skin.
Selecting Edit in the Colors section brings up a screen where you can tweak virtually all of the colors and characteristics of the skin to your choosing.
Selecting Edit in the Info section brings up the following screen:
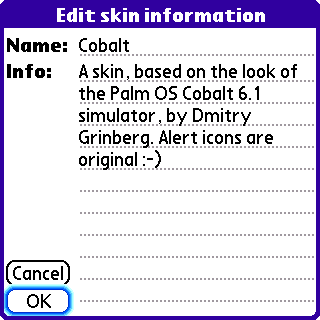
Here you can modify information pertaining to the name and description of the skin.
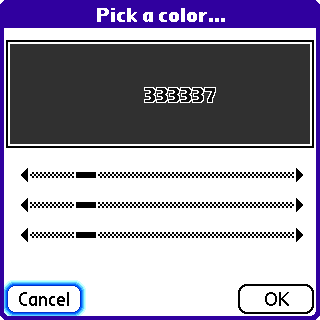
I'm not exactly sure what all is affected by this Colorize option - my suspicion is that it alters the overall hue of the skin itself, but not wanting to ruin the originally installed skins, I didn't play with this much. When I did select this option, a confirmation dialog appeared -
"This procedure places a lot of strain on system resources. It is very unlikely, but possible that it may crash. There should be no data loss. Continue?"
When I continued, I was presented with the above Pick a color ... panel:
The sliders can be used to control the color in the box in an almost infinite way. The number in the box changes accordingly.
Selecting this option also displays the system resource warning message. Continuing beyond the warning, the program begins to LoResifying... (there's a new word for ya) the skin. This operation took maybe a minute to complete. Selecting to use this new Low-res skin has the expected affect - all of the buttons, text, and controls are now in visibly lower resolution. Not sure if the value add here is that the skin maybe performs faster? There is no option to restore the skin to High-res.
Again, the system resource warning greets you, but continuing on quickly updates the skin. Honestly, I couldn't see the difference after running this. Guess I'll have to search for a manual, or via Google for hints on this one.
Let me shift gears now back to the main skinUI panel so that we can take a peek at some of its other features. Can you believe all of the customization this little gem allows?
SkinUI allows you to either apply your selected skin to all programs using the default preferences, or you can actually customize skinUI's behavior for a particular application. This would be useful for programs that have a high degree of graphics, or are performance intensive, or for some reason, do not operate well "skinned". Maintaining the list of programs which have this customization is done as simply as selecting the Apps button, then using the Add, Modify and Remove buttons. When you add a program to the list of applications, the following panel is displayed:
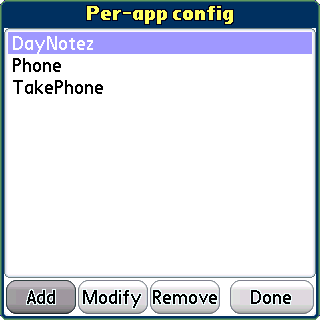
Basically, this allows you to adjust the preferences skinUI uses on an individual application basis. Wow, unbelievable!
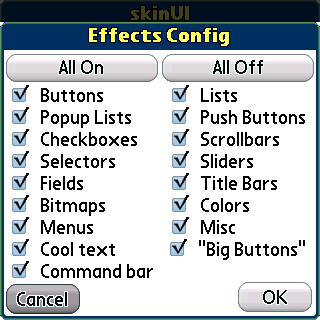
The Effects config screen allows you to decide which controls, fields, text types, etc are active. So if you decide as an example, that you don't want your checkboxes affected, just deselect it here. I actually found usage of this level of customization. One of my applications (DayNotez) did not have some of its application buttons appear selectable when the Cobalt skin was active. Adding the application to the Apps panel, then disabling its button behavior corrected the issue.
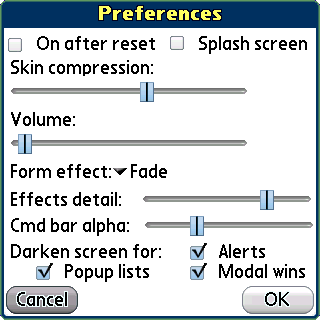
And you thought we were done with options huh? Yeah right. Here's a few more. You can decide whether to automatically load skinUI after a device reset, whether it displays a splash screen, the amount of skin compression to be used, overall volume setting and others. However, a few of these options I found truly unique and very cool:
The last set of options on the main skinUI panel deals with how to handle Fields. You have a choice of Nothing, Dots or Lines. To see the affect of this set of choices, you will need to bring up a screen that contains fields. I decided to use the default Memos application to demonstrate this.

So there you have it. If anyone tells you the Palm interface is old and boring, they haven't played around with this stellar application. Much thanks goes to Dmitry Grinberg for the incredible program. Oh yeah, and the fact that the cost is ZERO - yeah that makes it even nicer! Enjoy this full featured, stable and fun utility!
Note: Several users have reported that making or answering a call while skinUI is active has caused resets. If you experience this issue, a possible work around exists. Within skinUI, click on Effects and un-check the "Big Buttons" option. As reported in this TreoCentral forum thread, turning off "Big Buttons" seems to stabilize that issue.
|
|
||||||||||||||||||||
|
Copyright 1999-2016 TreoCentral. All rights reserved :
Terms of Use : Privacy Policy
TREO and TreoCentral are trademarks or registered trademarks of palm, Inc. in the United States and other countries;
the TreoCentral mark and domain name are used under license from palm, Inc.
The views expressed on this website are solely those of the proprietor, or
contributors to the site, and do not necessarily reflect the views of palm, Inc.
Read Merciful by Casey Adolfsson